How to Assemble a Printed Circuit Board at Home Step by Step
You can tackle circuit board assembly at home, even if you’re new to electronics. The process asks you to prepare your work area, place each part, solder carefully, and check your results. Safety matters, so always work slowly and pay attention to small details. When you finish your first board, you’ll feel proud and learn new skills. Many people find this hands-on hobby both fun and rewarding.
Key Takeaways
Gather basic tools like a soldering iron, solder, wire cutters, and tweezers before starting your project.
Set up a clean, well-lit workspace with good ventilation and use safety gear like glasses and an antistatic wrist strap.
Inspect and clean your printed circuit board carefully to ensure strong solder joints and avoid problems.
Place parts in order, starting with large through-hole components, then smaller parts, and solder each joint with care.
Check your work by visually inspecting solder joints and testing connections with a multimeter to catch and fix mistakes early.
Tools & Materials
Essential Tools
You need a few basic tools to start circuit board assembly at home. Here’s a list to help you get ready:
Soldering iron: This tool melts solder so you can connect parts to the board. Choose one with adjustable temperature if possible.
Solder: Use lead-free solder for safety. Thin solder wire works best for small parts.
Wire cutters: You will trim extra leads after soldering.
Tweezers: These help you pick up and place tiny components.
Small screwdriver: Some parts need a gentle push or twist.
Soldering stand or holder: This keeps your hot iron safe when not in use.
Tip: Always keep a damp sponge or brass wool nearby. You can use it to clean your soldering iron tip.
Components & Supplies
You also need the right parts and supplies for your project. Gather these before you begin:
Printed circuit board (PCB): This is the base for your project.
Electronic components: These include resistors, capacitors, LEDs, chips, and connectors. Check your project’s parts list.
Flux: This helps solder flow and stick better.
Desoldering pump or braid: Mistakes happen. These tools help you remove extra solder.
Safety glasses: Protect your eyes from splashes or flying bits.
Optional Tools
Some tools make your work easier, but you can finish most projects without them:
Magnifying glass or head loupe: See small details more clearly.
Hot air rework station: This helps with surface mount parts.
Solder paste and stencil: These tools help if you want to try advanced soldering.
Multimeter: Test your board for mistakes or broken parts.
You do not need every tool on this list. Start with the basics and add more as you gain experience. The right tools help you enjoy circuit board assembly and get better results.
Workspace & Safety
Setup Tips
You want your workspace to help you focus and stay safe. Start by picking a spot with good lighting. Natural light works great, but a bright desk lamp helps you see small parts and solder joints. Make sure your area has fresh air. Soldering can make fumes, so open a window or use a small fan to move air away from your face.
Keep your table or desk clear. Lay out your tools and parts before you start. Use small containers or trays to sort resistors, capacitors, and other pieces. This way, you will not lose anything or mix up parts. If you have a printed circuit board diagram, tape it to the wall or keep it close by for quick checks.
Tip: Put a silicone mat or an old towel under your project. This protects your table and keeps tiny parts from rolling away.
You should also keep drinks and snacks away from your work area. Spills can ruin your board or damage parts. Clean up as you go, so you always have space to work.
Antistatic Precautions
Static electricity can hurt sensitive electronic parts. You might not feel a shock, but even a small zap can break a chip or sensor. You can stop this by using a few simple tools.
Wear an antistatic wrist strap. Clip the end to a metal part of your workbench or a grounded object. This lets any static charge leave your body safely. If you do not have a wrist strap, touch a metal object before you handle parts.
Note: Some people use antistatic mats for extra safety. These mats connect to ground and protect your whole workspace.
Try not to wear clothes that make static, like wool sweaters. Work on a hard surface, not on carpet. Always handle parts by the edges, not the pins or leads. These steps help you keep your components safe and your project on track.
PCB Preparation
Inspecting the Board
Before you start, take a close look at your printed circuit board. Hold it up to the light and check for scratches, cracks, or missing copper traces. Make sure all the holes are clear and the pads look shiny. If you spot any damage, it’s better to fix it now than later. Sometimes, you might see tiny bits of dust or leftover material from the manufacturing process. These can cause problems during circuit board assembly, so you want to catch them early.
Tip: Use a magnifying glass to spot small defects or dirt that your eyes might miss.
Cleaning the Surface
A clean board helps you get strong solder joints and reliable connections. You can use a soft brush to sweep away dust or fibers. For sticky stuff like old flux or fingerprints, grab a specialty cleaning fluid or a mild flux remover. These work well on organic gunk. If you see stubborn spots, you might need a stronger cleaner, but always check that it’s safe for your board. Sometimes, water can sneak onto the surface. You can dry it with a gentle solvent or let it air out. For really tough dirt, try a spray wand or even a quick ultrasonic bath if you have one. Always pick a cleaner that dries fast and leaves no residue.
Choose a cleaner that is safe for plastics.
Test new cleaners on a scrap board first.
Ask for advice if you’re not sure which product to use.
Organizing Components
You can save time and avoid mistakes by sorting your parts before you begin. Lay out all your resistors, capacitors, and chips in small trays or cups. Group similar items together. Try to line up all your chips so their notches or dots face the same way. This makes it easier to place them correctly. For parts with a positive and negative side, like LEDs or electrolytic capacitors, match their markings with the board’s labels. Some people like to group parts by what they do, such as power, signal, or communication. This helps you find what you need and keeps your workspace tidy.
Keeping your parts organized means you won’t lose anything or put a part in the wrong spot.
Circuit Board Assembly Steps
Placing Through-Hole Parts
Start with the largest parts first. These are usually connectors, big capacitors, or sockets. Hold each part by the body, not the leads. Push the leads through the holes in your board. Make sure the part sits flat against the surface. If you see a plus or minus sign on the board, match it with the markings on your part. This step matters for things like LEDs and electrolytic capacitors.
Bend the leads a little on the other side of the board. This keeps the part from falling out when you flip the board over. Work slowly and check your placement before you move on. When you finish placing all the big parts, add the smaller ones like resistors and small capacitors. Use tweezers if the parts are tiny.
Tip: Trim the extra leads after soldering. Use sharp wire cutters and wear safety glasses to protect your eyes from flying bits.
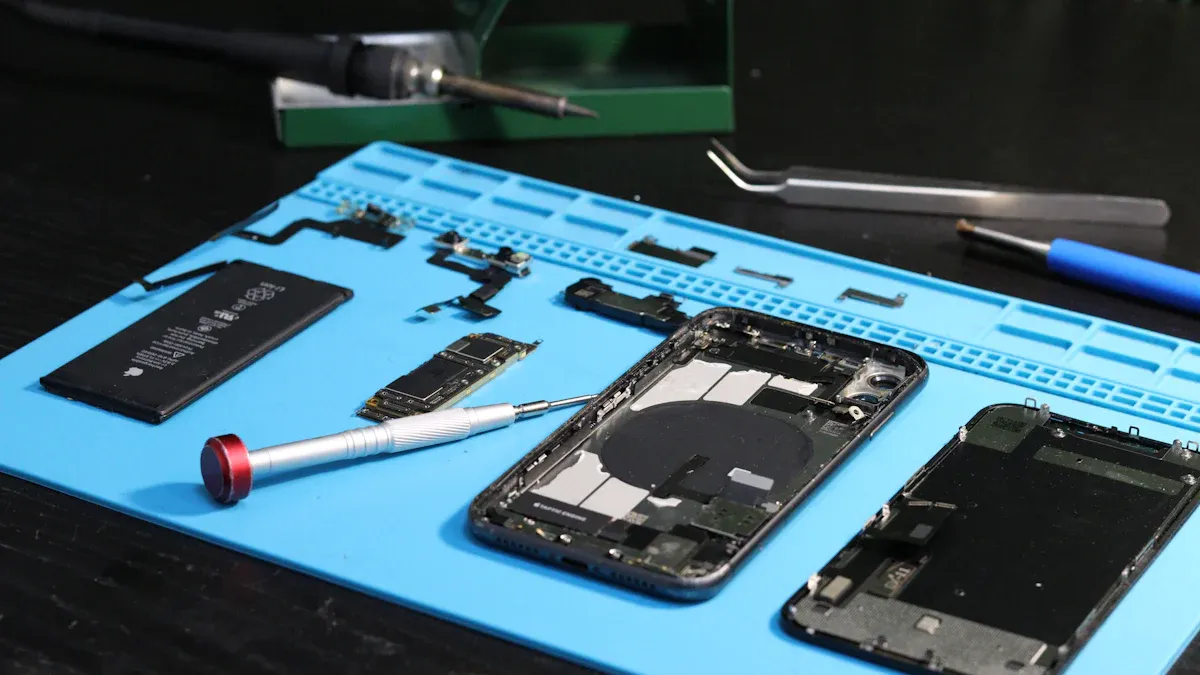
Placing Surface Mount Parts
Surface mount parts look small and flat. You will need steady hands and good lighting for this step. Use tweezers to pick up each part. Place it on the board where the outline matches the shape of the part. Some boards have a dot or line to show you which way the part should face.
If you use solder paste, put a tiny dot on each pad before you place the part. You can use a syringe or a stencil for this. Press the part gently into the paste so it sticks. Double-check the position before you start soldering. If you make a mistake, you can move the part with your tweezers.
Note: Work with one type of part at a time. This helps you stay organized and avoid mixing up values.
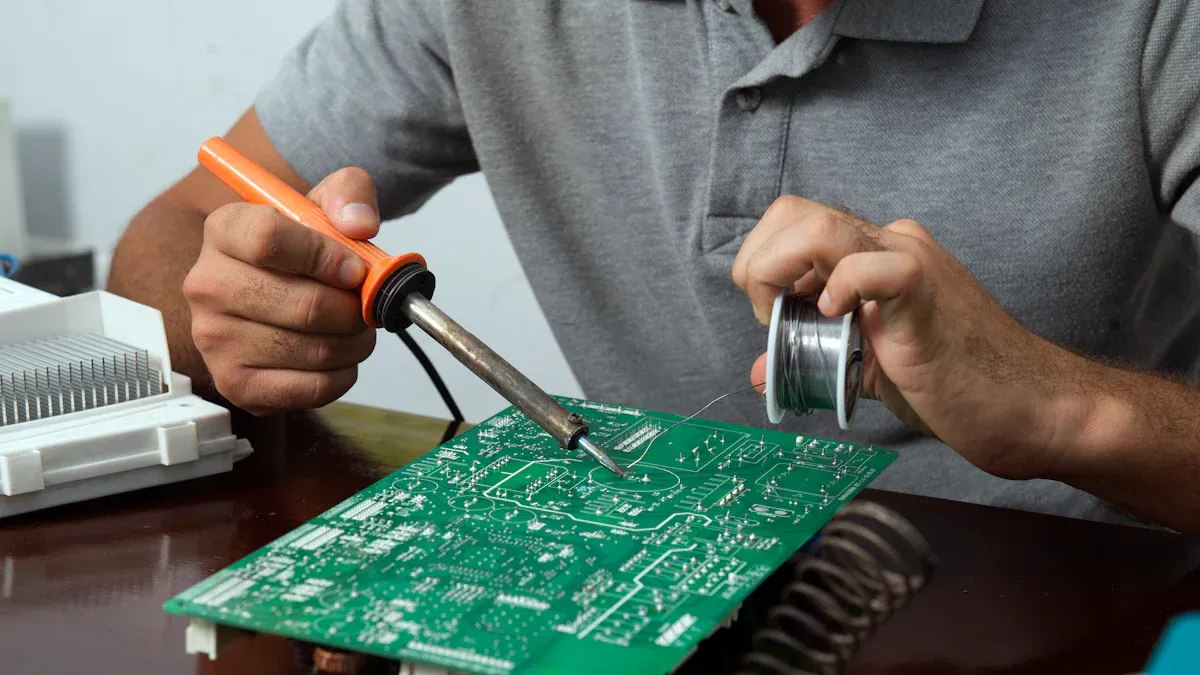
Soldering Tips
Soldering is the heart of circuit board assembly. Good solder joints make your board work well and last longer. Here are some tips to help you get strong, shiny connections and avoid common problems:
Use just enough solder to form a small, shiny joint. Hold the solder wire to the joint for only 1-2 seconds. Too much solder can cause bridges between pins.
Set your soldering iron temperature between 280-320°C (536-608°F). This range helps the solder flow well and prevents cold joints or damage.
Hold the soldering iron at a 45-degree angle to the joint. This gives you better control and keeps solder from spreading to nearby pins.
Solder one pin at a time, especially for parts with many pins. This stops solder from pooling and making accidental bridges.
Apply flux before soldering. Flux helps the solder flow smoothly and lowers the chance of unwanted connections.
If you see a dull or cracked joint, reheat it and add a little more solder. Always clean your soldering iron tip often. This keeps your joints neat and helps the solder stick better.
Using Solder Paste & Reflow
Solder paste and reflow make surface mount assembly easier, especially for small parts. Solder paste looks like gray putty. It holds tiny balls of solder and flux together. You can put it on the pads with a stencil or a small syringe.
After you place all your parts on the paste, you need to heat the board. A hot air rework station works well for this. Move the hot air tool in small circles over the parts. The paste will melt and form strong joints. Watch the parts as you heat them. They may shift a little as the solder melts, but they should settle into place.
Tip: Practice on a scrap board first. This helps you learn how much paste to use and how long to heat the board.
If you do not have a hot air tool, you can use a regular soldering iron for larger surface mount parts. Just touch the tip to the pad and let the solder flow. Be careful not to overheat the part.
Circuit board assembly takes patience and practice. Each step builds your skills and helps you make better boards in the future.
Inspection & Testing
Visual Checks
You finished soldering your parts. Now, take a close look at your board. Use a magnifying glass or just your eyes. Check every joint. Good solder joints look shiny and smooth. Bad ones look dull, cracked, or have too much solder. Make sure you do not see any bridges—these are blobs of solder that connect two pins by mistake. Look for missing parts or anything in the wrong spot. If you spot a problem, fix it before you move on.
Tip: Hold your board up to a bright light. Shadows can help you spot mistakes you might miss.
Cleaning After Soldering
Soldering leaves behind sticky flux. This can attract dust and cause problems later. You should clean your board after you finish soldering. Use a small brush and some isopropyl alcohol. Gently scrub the board. Wipe away any leftover flux. Let the board dry before you touch it again. Clean boards look better and work better.
Multimeter Testing
A multimeter helps you check your work. Set your multimeter to the continuity mode. Touch the probes to both ends of a connection. If you hear a beep, the connection works. Test every important path. You can also check for shorts. Place the probes across places that should not connect. No beep means you are safe. This step helps you catch mistakes before you power up your project.
Test Type | What to Check | Good Result |
|---|---|---|
Continuity | Soldered connections | Beep or low ohms |
Shorts | Between power lines | No beep |
Troubleshooting
Sometimes, things do not work the first time. Do not worry. Start by checking your power. Make sure your board gets the right voltage. Look for loose parts or cold solder joints. If something looks wrong, reheat the joint and add a bit more solder. Double-check the direction of your parts. Many problems in circuit board assembly come from small mistakes. Take your time and fix each issue one by one.
Stay patient. Every problem you solve teaches you something new.
You just learned how to tackle circuit board assembly at home. Here are some tips from experienced hobbyists to help you grow:
Try open-source tools like KiCad for your designs.
Start with simple projects before moving to complex boards.
Test your work step by step, especially the power section.
Wear safety gear and keep your workspace clean.
Take photos and label parts as you go.
Stay patient and careful. Each project builds your skills and confidence. You will feel proud every time your board works!
FAQ
How do I know if my solder joint is good?
A good solder joint looks shiny and smooth. It covers the pad and the lead without extra blobs. If you see cracks or dull spots, try reheating and adding a bit more solder.
Tip: Use a magnifying glass to check your work!
Can I fix a mistake if I put a part in the wrong spot?
Yes, you can! Use a desoldering pump or braid to remove the solder. Gently lift the part with tweezers. Place it in the correct spot and solder it again. Take your time and stay patient.
What should I do if my board does not work?
Start by checking your power and connections. Look for missing or backwards parts. Test with a multimeter. If you find a problem, fix it and test again. Most issues come from small mistakes.
Double-check your work
Test each section
Do I need expensive tools to start?
No, you do not! You can begin with basic tools like a soldering iron, wire cutters, and tweezers. As you get better, you might want to add more tools, but you can build your first board with just the basics. 😊
See Also
Proven Methods To Overcome Shortages In Electronic Parts
Step By Step Guide To Setting Up A 555 Timer
Best Practices For Quickly Finding Electronic Parts During Crises
A Comprehensive Overview Of Digital Integrated Electronic Circuits
Ways Analog Devices Maintains A Strong And Reliable Chip Supply