Volume control chip made easy for your audio project

Choosing the right VOLUME CONTROL chip starts with understanding what matters most for your audio project. You need to think about analog or digital options, where you place the chip, impedance, number of channels, and how you want to control volume. The table below highlights how analog and digital chips differ in signal-to-noise ratio, distortion, and dynamic range. When you focus on your project’s needs, you make smart choices step by step.
Performance Aspect | Analog Chips | Digital Chips |
|---|---|---|
SNR | Near-perfect with 24-bit or higher | |
THD+N | Hard to get below -120 dB | Very low with good DSP |
Dynamic Range | Limited by physical factors | Reduced by digital attenuation |
Key Takeaways
Choose between analog and digital volume control chips based on your project’s audio signal type, control needs, and desired sound quality.
Match the chip’s number of channels to your project to avoid losing sound or wasting resources.
Pick a control method—knob, buttons, or remote—that fits your skills and project style for easy volume adjustment.
Check the chip’s power supply requirements carefully to prevent damage and ensure efficient operation.
Use datasheets and support resources to compare chip features, noise levels, and availability for a confident, smart choice.
Project Needs
Audio Signal
You need to know the type of audio signal in your project. Some projects use line-level signals, while others use microphone or speaker-level signals. Each type has different voltage and current needs. If you use a digital source, you may want a chip that works with digital signals. If you use analog sources, you need a chip that handles analog signals well.
When you choose between analog and digital volume control, you should look at how each affects sound quality. In a real-world test, digital volume control reached a THD+N (Total Harmonic Distortion plus Noise) of 0.00060% at 0.992Vrms. An analog potentiometer had a higher THD+N of 0.0070% at 0.194Vrms. This means digital control can give you about 11.8 dB better performance. Digital volume control lowers the signal but not the noise floor, so the dynamic range drops. However, if your DAC has a high dynamic range, you will not hear the noise even at low volumes. You can also use tools like the Dewesoft Sound Quality system to measure things like loudness and clarity. These tools help you check how your audio sounds to real people.
Channels
Count the number of audio channels you need to control. A simple project may only need one channel (mono). Most music projects use two channels (stereo). Some home theaters or advanced systems need more, like 5.1 or 7.1 channels. You must pick a chip that matches your channel count. If you use fewer channels than you need, you will lose sound in some speakers. If you use more, you may waste space and money.
Tip: Always check your source and output devices before choosing the number of channels for your VOLUME CONTROL chip.
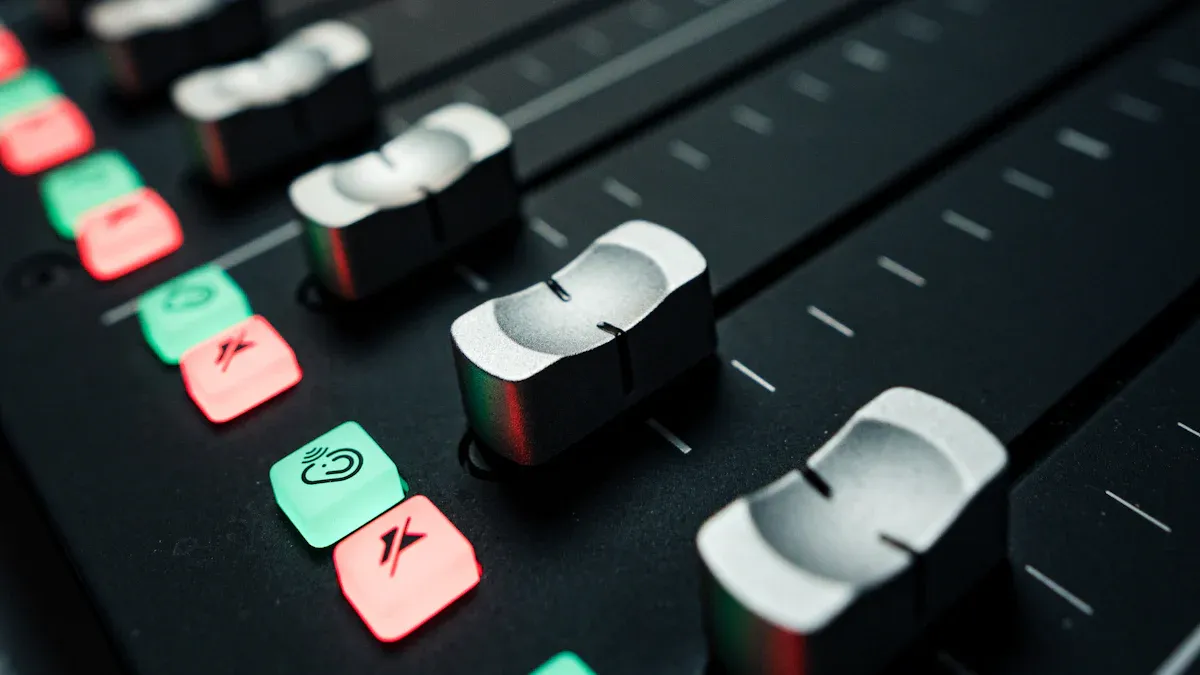
Control Type
Decide how you want to adjust the volume. You can use a knob, buttons, or even a remote control. Some chips let you use a rotary encoder or a motorized potentiometer. Others work with digital signals and can connect to microcontrollers or computers. If you want to add smart features, look for chips with digital interfaces like I2C or SPI. For simple manual control, analog chips with knobs work well.
Manual control: Good for basic projects and easy to use.
Digital control: Best for remote or automated systems.
Choose the control type that fits your project and your skills.
Power Supply
Check the power supply your project uses. Some chips need 5V, while others need 3.3V or even dual supplies like ±12V. Using the wrong voltage can damage the chip or make it work poorly. Make sure your power supply matches the chip’s needs. If your project runs on batteries, look for chips with low power use. If you use a wall adapter, you have more options.
Note: Always read the datasheet for the chip to find the correct voltage and current requirements.
VOLUME CONTROL Chip Features
Analog vs. Digital
You can choose between analog and digital volume control chips for your project. Analog chips use resistors, potentiometers, or stepped attenuators to change the signal level. These work well for simple designs and give you a smooth, natural feel when you turn a knob. Stepped attenuators use a series of resistors to set the volume in fixed steps. Ladder networks are another type of analog control that use switches and resistors for precise steps.
Digital chips use electronic circuits to adjust the volume. You control them with buttons, microcontrollers, or even remote controls. Digital chips often use I2C or SPI interfaces. These chips can offer more features, like memory for saving settings or remote access. You can also find chips that combine both analog and digital features for more flexibility.
Tip: If you want easy integration with smart devices or automation, digital chips are a strong choice.
Noise & Distortion
Noise and distortion can affect the sound quality in your audio project. You need to understand how different chips handle these issues at various volume settings.
Passive attenuators can add noise and distortion. High impedance (over 500 ohms) increases thermal noise and distortion. Low impedance can overload the audio driver and cause more distortion.
The impedance in passive attenuators changes as you adjust the volume. This can change the frequency response and reduce high frequencies at some settings.
Active gain circuits, when designed well, keep noise and distortion low. They also keep the frequency response and output impedance steady at all volume levels.
Analog volume-control ICs can have noise and distortion from crosstalk, power use, and non-linear effects. High impedance increases noise, while low impedance can cause heat and distortion.
Digital signal processing (DSP) chips can add distortion if not designed well. Good DSP chips keep noise and distortion low.
Some advanced systems, like Benchmark’s HDR-VC™, use a mix of active gain and passive attenuation. They keep noise and distortion low across a wide range of volume settings.
You should always check the datasheet for noise floor and distortion (THD+N) values. Good gain staging and impedance management help you keep your audio clean.
Interface Options
You have many ways to control the volume in your project. The right interface depends on your needs and skills.
Rotary knobs: These are common for analog chips. You turn the knob to set the volume.
Stepped switches: These give you fixed volume steps. They work well for precise control.
Motorized potentiometers: These let you adjust the volume by hand or with a remote.
Digital controls: You can use buttons, touch panels, or remote controls. Many digital chips connect to microcontrollers using I2C or SPI.
Software interfaces: Some chips let you control the volume from a computer or app.
Note: Choose an interface that matches your project’s style and your comfort with electronics.
Size & Package
The size and package of a VOLUME CONTROL chip matter for your project’s layout and assembly. Many modern chips come in small QFN packages, starting at 5×5 mm. The pad sizes are usually about 1.0 mm with a 0.5 mm pitch. The exposed thermal pad is often 50-100% larger than the lead pads to help with heat. You need to follow tight tolerances in pad size and pitch to avoid soldering problems like bridging or cold joints.
Industry standards, such as IPC-7351B, guide these measurements. You should always check the manufacturer’s datasheet for exact sizes. Even small changes in size can affect how well the chip fits and works on your board. For fine-pitch devices, stencil thickness is about 0.125 mm, and the solder mask openings are a bit larger than the copper pads to allow for small errors in placement. Good thermal design helps the chip stay cool and work well.
Remember: Careful attention to size and package details ensures your VOLUME CONTROL chip works reliably in your project.
Matching Chip to Project
Use Cases
You can find VOLUME CONTROL chips in many types of audio projects. These chips help you manage sound in both simple and advanced systems.
In network audio systems, devices like the AXIS C8310 let you adjust volume, pick audio sources, and even trigger smart actions. You might see these in stores, schools, or warehouses where noise levels change often.
Voice chips with built-in volume control and DSP features appear in toys, alarms, home automation, and kiosks. These chips play sounds or voice messages when you press a button or use a microcontroller. They also help in smart homes by giving voice feedback or in factories by announcing machine status.
Many modern DACs and DSPs use hardware volume control to change digital audio levels without analog resistors. This method keeps audio quality high and works well in digital music players and computers.
You can use these chips for tasks like muting, switching sources, playing messages, or even unlocking doors with sound triggers. Some systems give you tactile or visual feedback and allow remote setup.
Chip Comparison
When you compare chips, look at what matters most for your project.
Feature | Analog Chip | Digital Chip |
|---|---|---|
Control Method | Knob, switch | Button, remote, MCU |
Audio Quality | Smooth, natural | High, flexible |
Integration | Simple | Advanced features |
Power Use | Low to moderate | Often low |
Channels | 1-2 common | 2+ easy |
Analog chips work well for simple, hands-on projects. Digital chips fit best if you want remote control, automation, or more channels.
Checklist
Before you pick a chip, use this checklist:
Know your audio signal type (analog or digital).
Count the channels you need.
Decide on manual or digital control.
Check your power supply.
Review chip size and package.
Look for clear datasheets and support.
Think about your project’s future needs.
Tip: Always match the chip’s features to your project’s goals for the best results.
Sourcing Tips
Datasheets
You should always start with the datasheet when you pick a volume control chip. The datasheet gives you the facts you need to make a smart choice. It lists the chip’s features, pin layout, and electrical limits. You can also find key performance numbers that show how well the chip works in real audio projects.
Here are some important parameters you will see in a good datasheet:
Performance Parameter | Description |
|---|---|
Bit Depth and Processing Precision | 28-bit processing with a 56-bit accumulator for high precision and low-level signal quality |
Sample Rate Support | Supports sample rates up to 192 kHz, suitable for high-fidelity audio |
Click-Free Volume Control | Target/slew RAM enables smooth, click-free volume adjustments |
Digital Signal Processing Algorithms | Sophisticated DSP comparable to high-end studio equipment, including multi-band dynamics |
Parameter Update Mechanism | Safeload control port allows transparent and glitch-free parameter updates |
Multi-Channel Handling | Supports multiple audio channels (up to 16 channels in TDM mode) |
You should look for these numbers to check if the chip meets your needs. A chip with high bit depth and fast sample rates will give you clear and accurate sound. Features like click-free volume control and safe parameter updates help you avoid pops or glitches.
Tip: Always download the latest datasheet from the manufacturer’s website. This helps you avoid mistakes and keeps your project safe.
Availability
You need to check if the chip is easy to buy. Some chips are popular and always in stock. Others may be hard to find or only sold in large amounts. You can search on trusted sites like Digi-Key, Mouser, or Arrow. These sites show you prices, stock levels, and shipping times.
Look for chips that are in stock and ready to ship.
Check if the chip comes in small packs for DIY projects.
Compare prices to stay within your budget.
If you pick a rare chip, you may wait a long time or pay more. Choosing a common chip saves you time and money.
Support
Good support makes your project easier. You should pick chips with clear guides, example circuits, and active user forums. Some brands offer online help or video tutorials. This support helps you solve problems fast.
Check if the manufacturer has an FAQ or help center.
Look for chips with demo boards or starter kits.
Join online groups where people share tips and fixes.
Note: Strong support and clear documentation help you finish your project with less stress and better results.
You can choose the right VOLUME CONTROL chip by following each step in this guide. Start by understanding your audio signal, channels, control type, and power needs. Use the checklist to compare features and find the best fit. When you follow these tips, you make a smart and confident choice. Build your next audio project with ease and enjoy great sound every time!
FAQ
What is the difference between analog and digital volume control chips?
Analog chips use resistors or potentiometers to change the sound level. Digital chips use electronic signals and can connect to microcontrollers. You get more features with digital chips, like remote control and memory.
Can I use a volume control chip with a battery-powered project?
Yes, you can use many chips with batteries. Look for chips that use low power. Always check the datasheet for voltage and current needs.
How do I avoid noise and distortion in my audio project?
Use chips with low THD+N values. Keep wires short and use good grounding. Follow the datasheet for best results.
What tools help me test my volume control chip?
You can use a multimeter to check voltage. For sound quality, try audio analyzers or software like Dewesoft. These tools help you measure noise, distortion, and loudness.
See Also
Understanding The Function Of Low Impedance Switch Chips
Key Features And Uses Of IC Audio Signal Processors
Step By Step Guide To Designing Audio Power Amplifiers